If you have connected to eduroam before via a certificate from a different institution, please follow the tutorial below to remove the certificate. Printing will not work if connected to eduroam in this way.
1.
Click anywhere on your Desktop, and then click "Go" at the top of your screen. Scroll to the bottom of the menu that comes up and select "Connect to Server"
2.
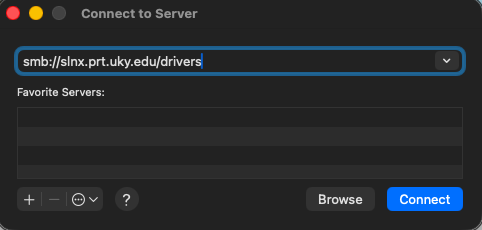
Once on the Connect to Server window, type in "smb://slnx.prt.uky.edu/drivers" without the quotations into the window and click "Connect". When prompted for credentials, use your linkblue (without @uky.edu) username and password.
After you connect to the network drive, if you have already printed from this Mac before, you should be able to print now. If this is a fresh install then close the window that comes up and continue on to the next step.
3.
Click on the Apple logo at the top left of your screen. Select "System Settings".
4.
Scroll down to "Printers and Scanners". Select "Add Printer, Scanner, or Fax...".
5.
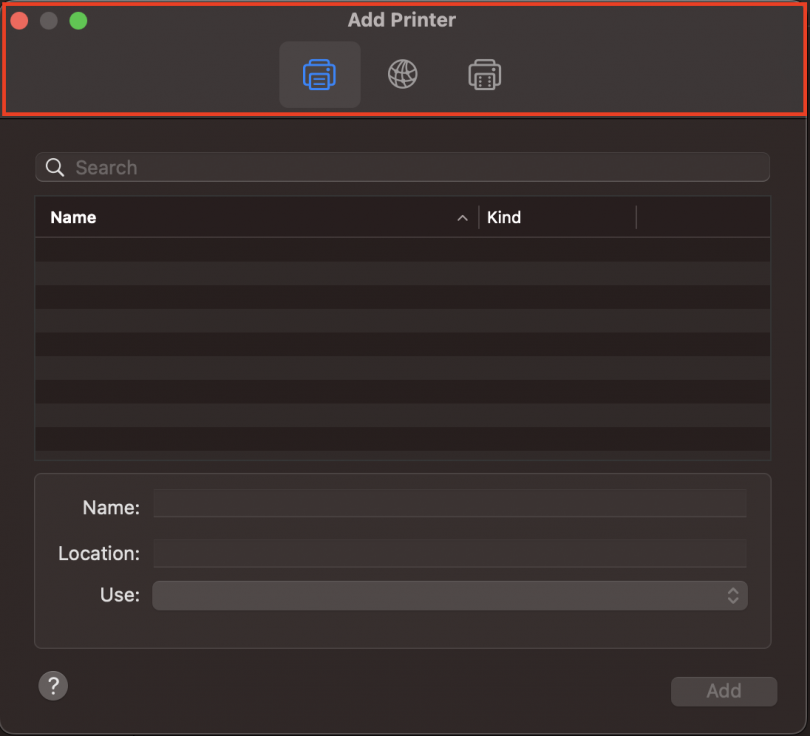
Right click in the top section of the "Add Printer" window and select "Customize toolbar".
5.
Drag the "Advanced" icon into your toolbar.
6.
Click on the newly added "Advanced" icon and let it load for a minute. Once the options come up. Ensure your settings are set to the image below.
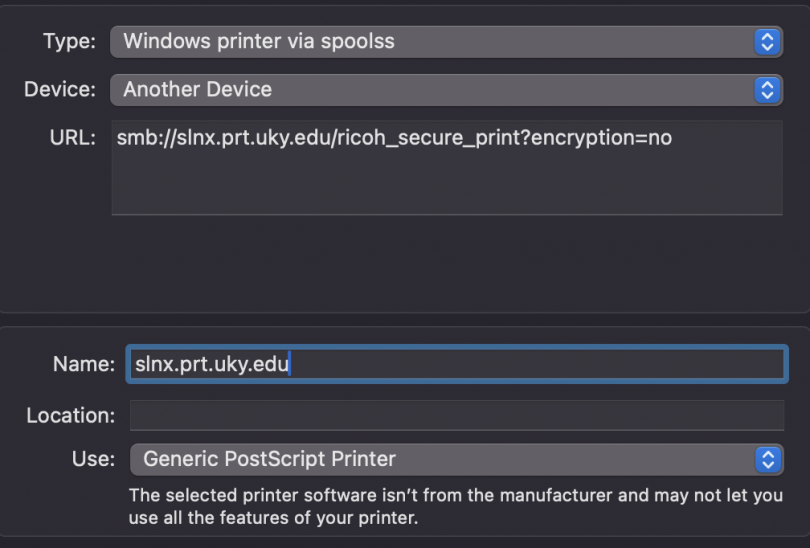
smb://slnx.prt.uky.edu/ricoh_secure_print?encryption=no
7.
Add the printer, and select "OK" in the next window that comes up.
8.
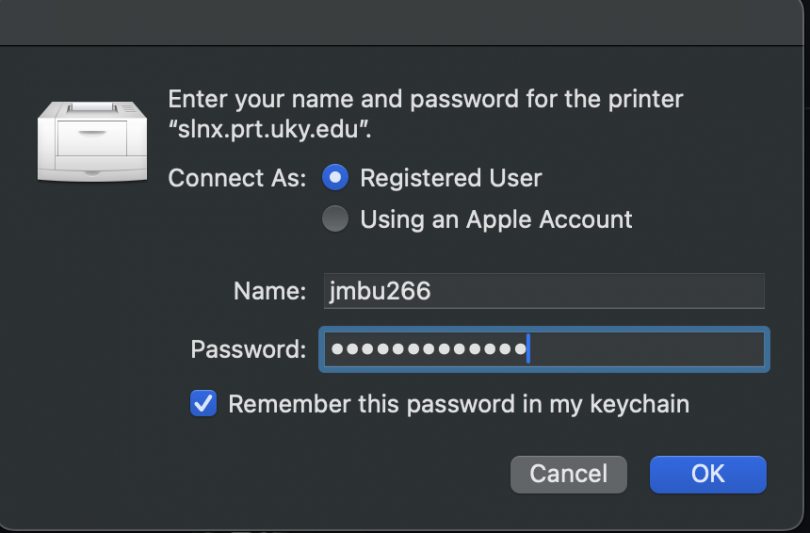
Open a document that you would like to print, and send the job to the newly added printer. If you are prompted for credentials, enter your linkblue credentials (do not include @uky.edu for the username) and ensure you choose to remember your information in keychain. Image below of what this should look like.