
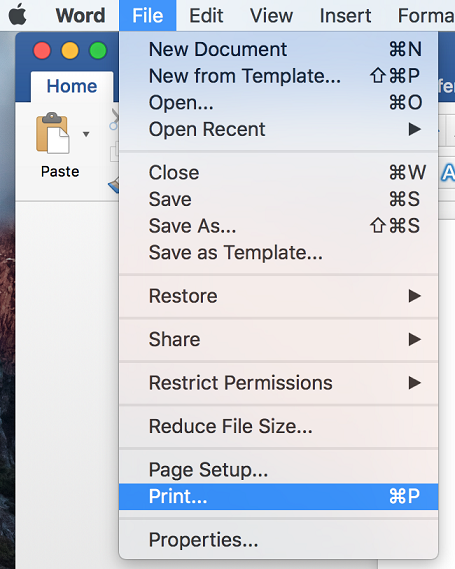
Open Microsoft Word to a new or existing document.
Word is one of the few programs on Mac that provides full printing options, and it's the one most commonly used in the college.
In Word, go to File -> Print...
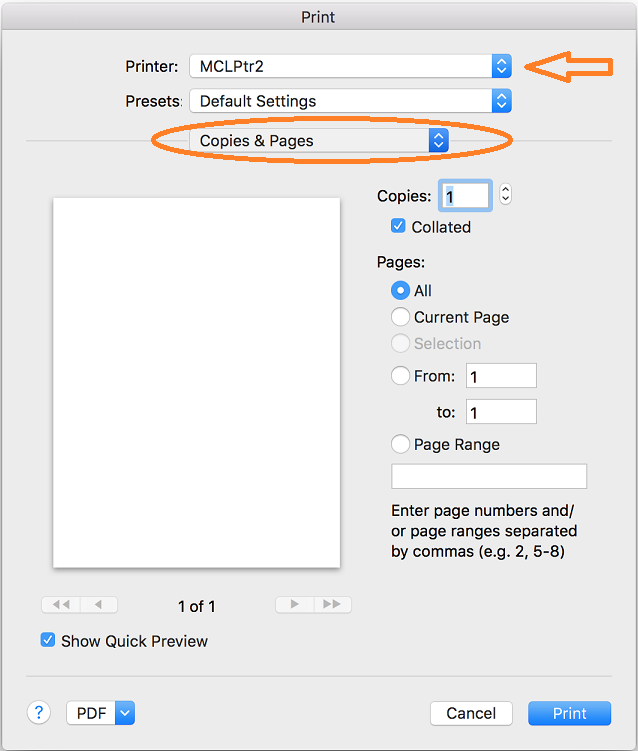
Make sure your departmental copier is selected, and then click on Copies and Pages.
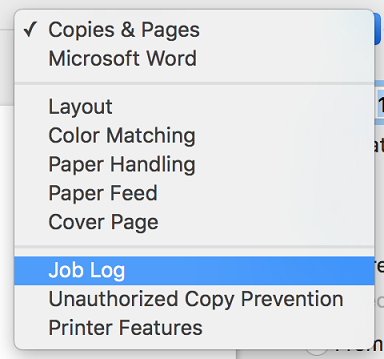
Select Job Log.
If Job Log is not an available option, you may not have the correct driver installed for your department's printer. Please refer to https://www.as.uky.edu/tutorials/configuring-your-mac-printing-ricoh-co… for instructions on installing a network printer.
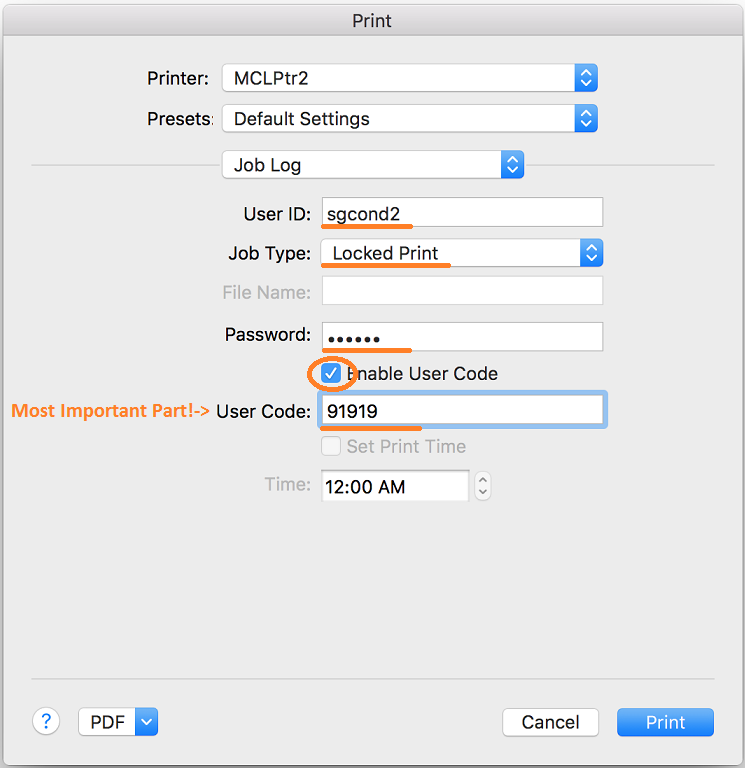
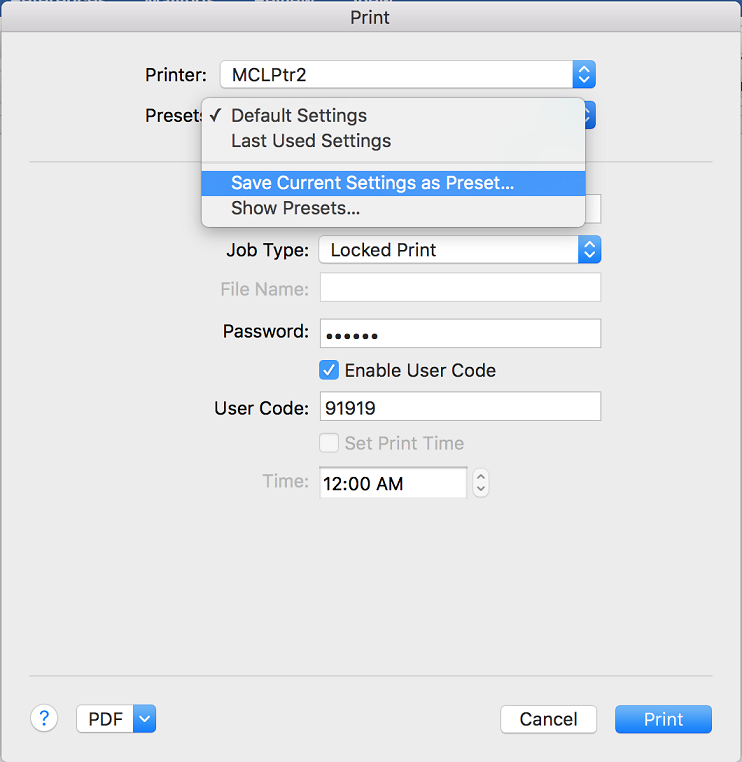
Configure as shown.
Your locked print job will be listed on the copier under the user ID you specify here, and the password is required for releasing confidential print jobs from the copier. The password can be any series of numbers, but I usually suggest using your print/copy code.
If you have been given a printing code by your departmental manager, click the checkbox for enable user code and enter the code as shown. If your department has restricted printing on the device, you will not be able to successfully print without a valid printing code saved here.
Once you have entered your user code, click on Presets, and Choose Save Current Settings as Preset...
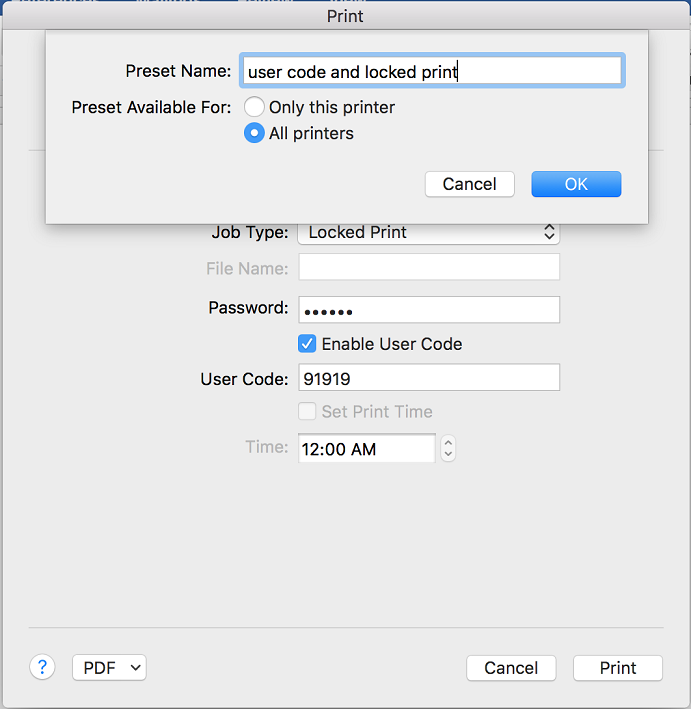
Type in a name for your preset, and click OK.
If there is more than one printer in your department, change the preset to be available for all printers.
Next time you go to print a document, make sure the preset you just configured is selected before hitting print.